
Your First Domain
After installing Vectis Mail, open the admin URL in your browser. The Setup Wizard will walk you through five steps: add domain → DNS records → verify → create mailbox → deliverability review.
Setup at a glance
Section titled “Setup at a glance”- Log in to the admin UI with the credentials from the install banner.
- Add your domain in the Setup Wizard.
- Publish DNS records (MX, SPF, DKIM, DMARC).
- Verify domain ownership with the verification TXT record.
- Create your first mailbox for the new domain.
- Deliverability review with a free GlockApps test.
- Connect your mail app with the IMAP / SMTP settings the wizard prints.
Log in
Section titled “Log in”Navigate to https://your-hostname/admin and sign in with the admin email and password printed at the end of vectis install.

If you lost the admin password, see Lost the admin password? on the install page.
Setup Wizard
Section titled “Setup Wizard”On first login the wizard opens automatically. Each step lights up as you complete it, with a ✓ once done.
Step 1 — Add your domain
Section titled “Step 1 — Add your domain”Enter the mail domain you want to use (e.g. example.com if you want addresses like you@example.com). This is the domain that appears to the right of the @ in your email addresses, not the hostname of the server itself.
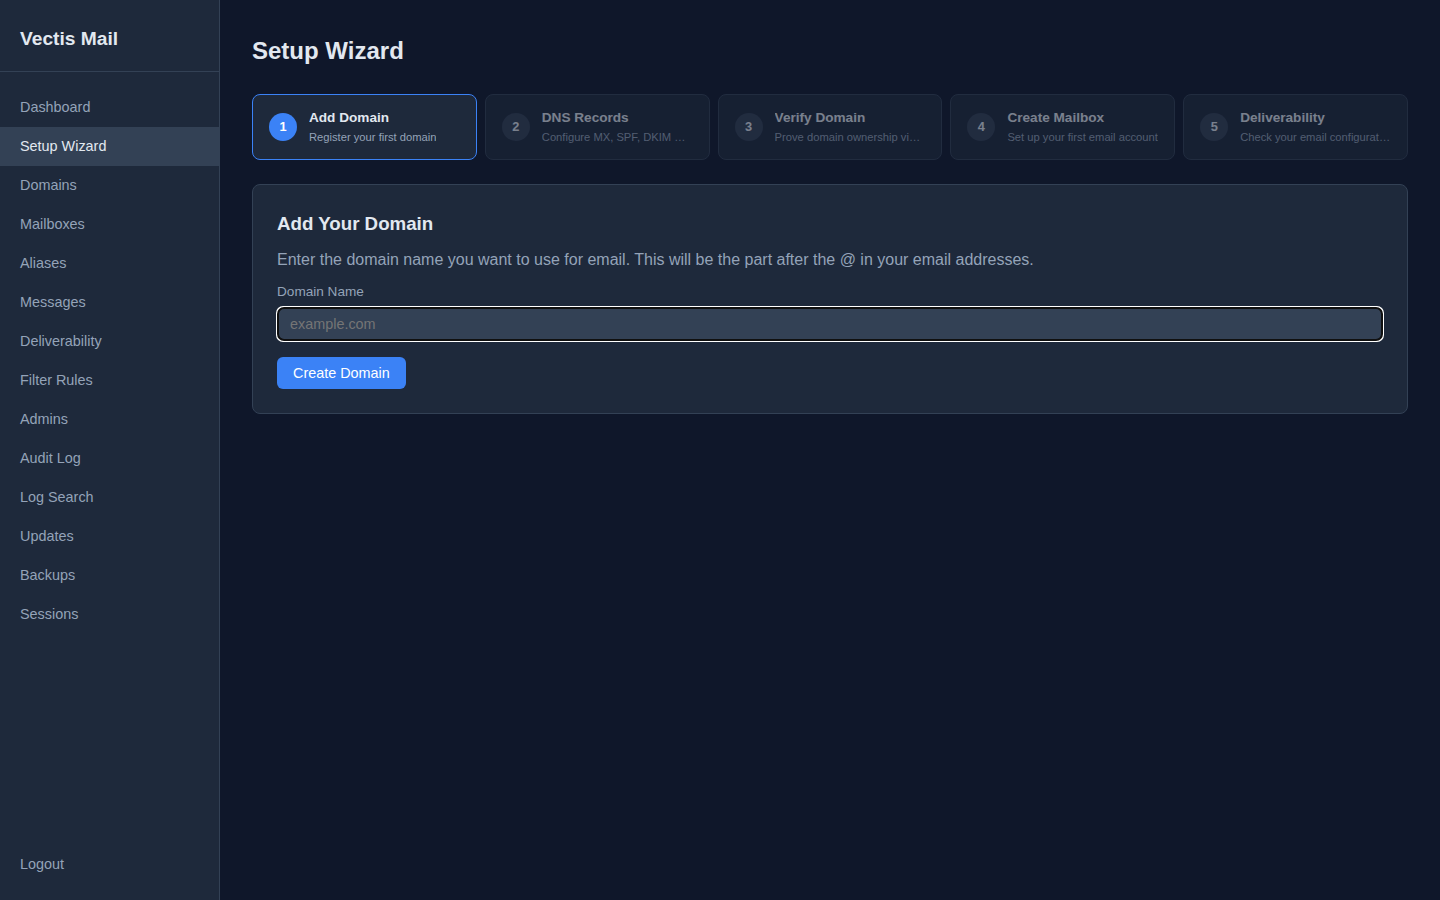
Click Create Domain. Vectis generates a fresh DKIM key pair for the domain and advances you to step 2.
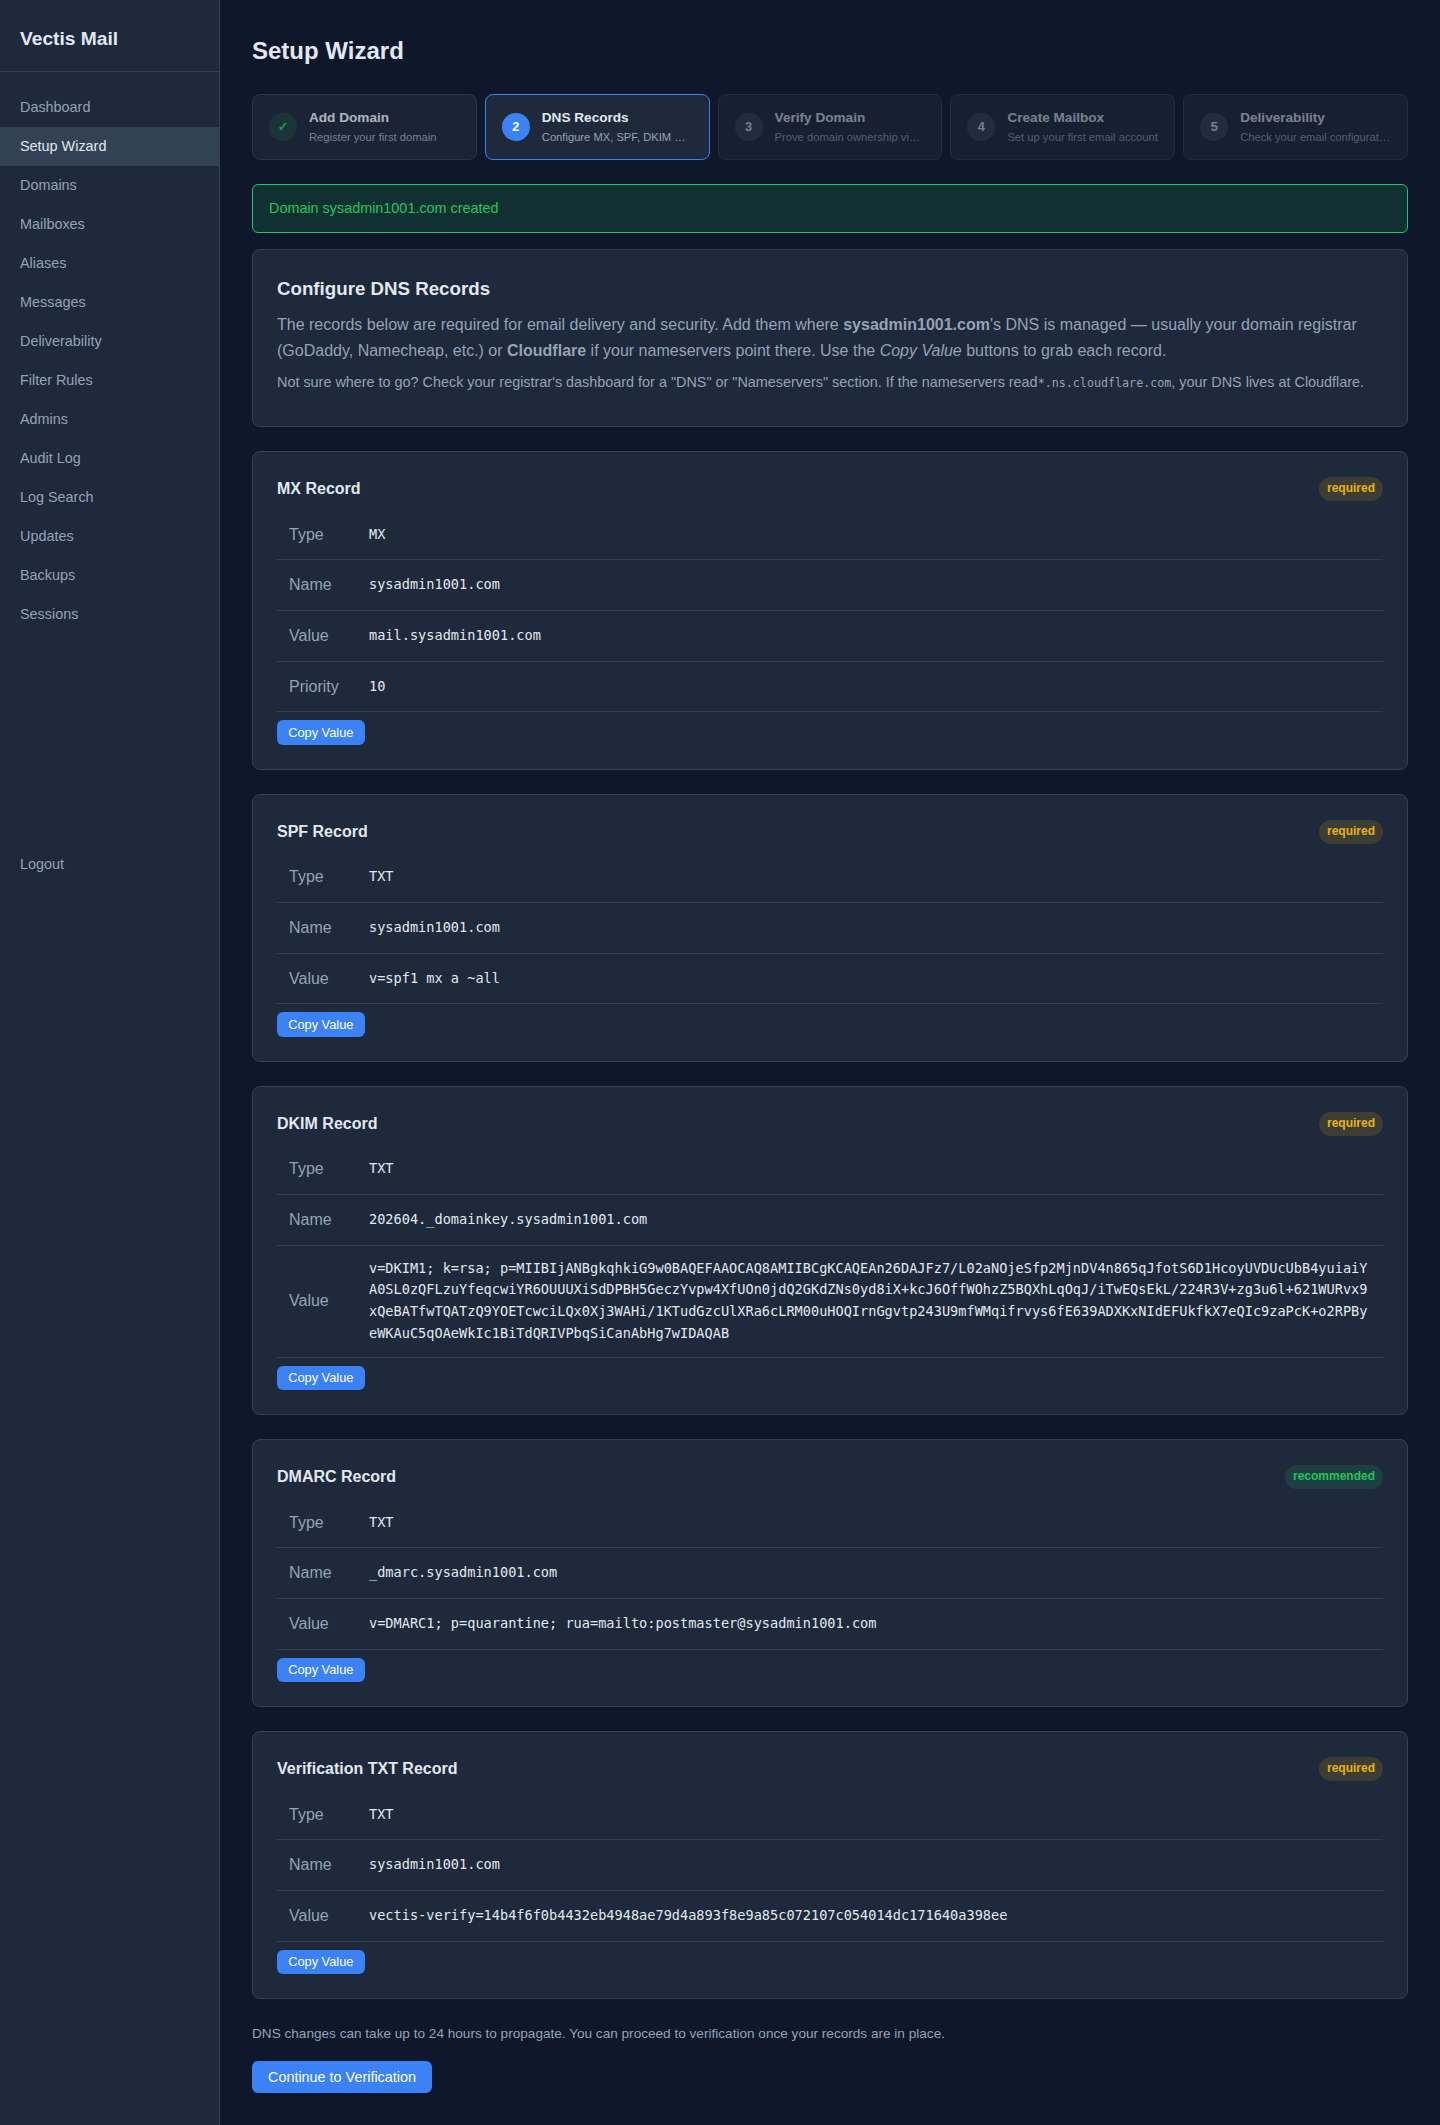
Step 2 — Publish DNS records
Section titled “Step 2 — Publish DNS records”The wizard shows every record you need to add at your domain’s DNS provider (registrar or Cloudflare, depending on where your nameservers point). Each block has a Copy Value button.
| Record | Purpose | Required? |
|---|---|---|
| MX | Where to deliver mail for this domain | required |
| SPF | Which servers are allowed to send as this domain | required |
| DKIM | Public half of the signing key (validates message integrity) | required |
| DMARC | Policy for receivers when SPF/DKIM fail | recommended |
| Verification TXT | Proves you own the domain before Vectis will send from it | required |
DNS changes typically propagate in under a minute at Cloudflare, but up to 24 hours at slower providers. Once all five records are live, click Continue to Verification.
Step 3 — Verify domain ownership
Section titled “Step 3 — Verify domain ownership”Vectis queries your DNS for the vectis-verify=… TXT record. If it finds a match, verification passes and the wizard jumps to step 4.

If the TXT record hasn’t propagated yet, you’ll see an error — wait 30 seconds and click Verify Now again. You can also step back to review the record value.
Step 4 — Create your first mailbox
Section titled “Step 4 — Create your first mailbox”Fill in a username (the local part of the address), a password (minimum 12 chars with letters + numbers — use the Generate button for a strong random one), and an optional display name. Default quota is 1024 MB.
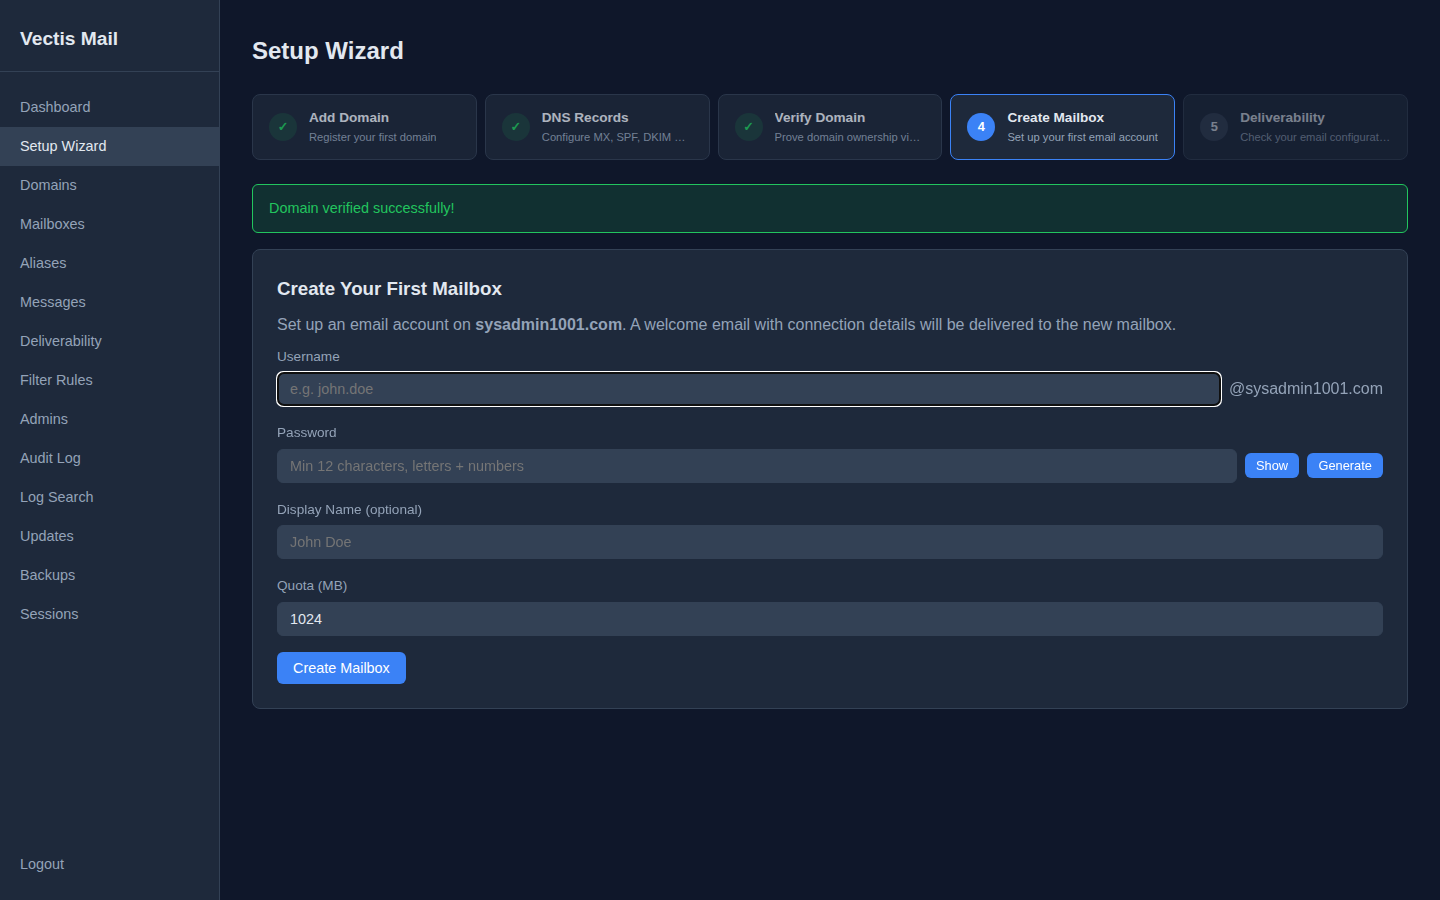
A welcome email with the connection details gets delivered to the new mailbox on creation. Click Create Mailbox to continue.
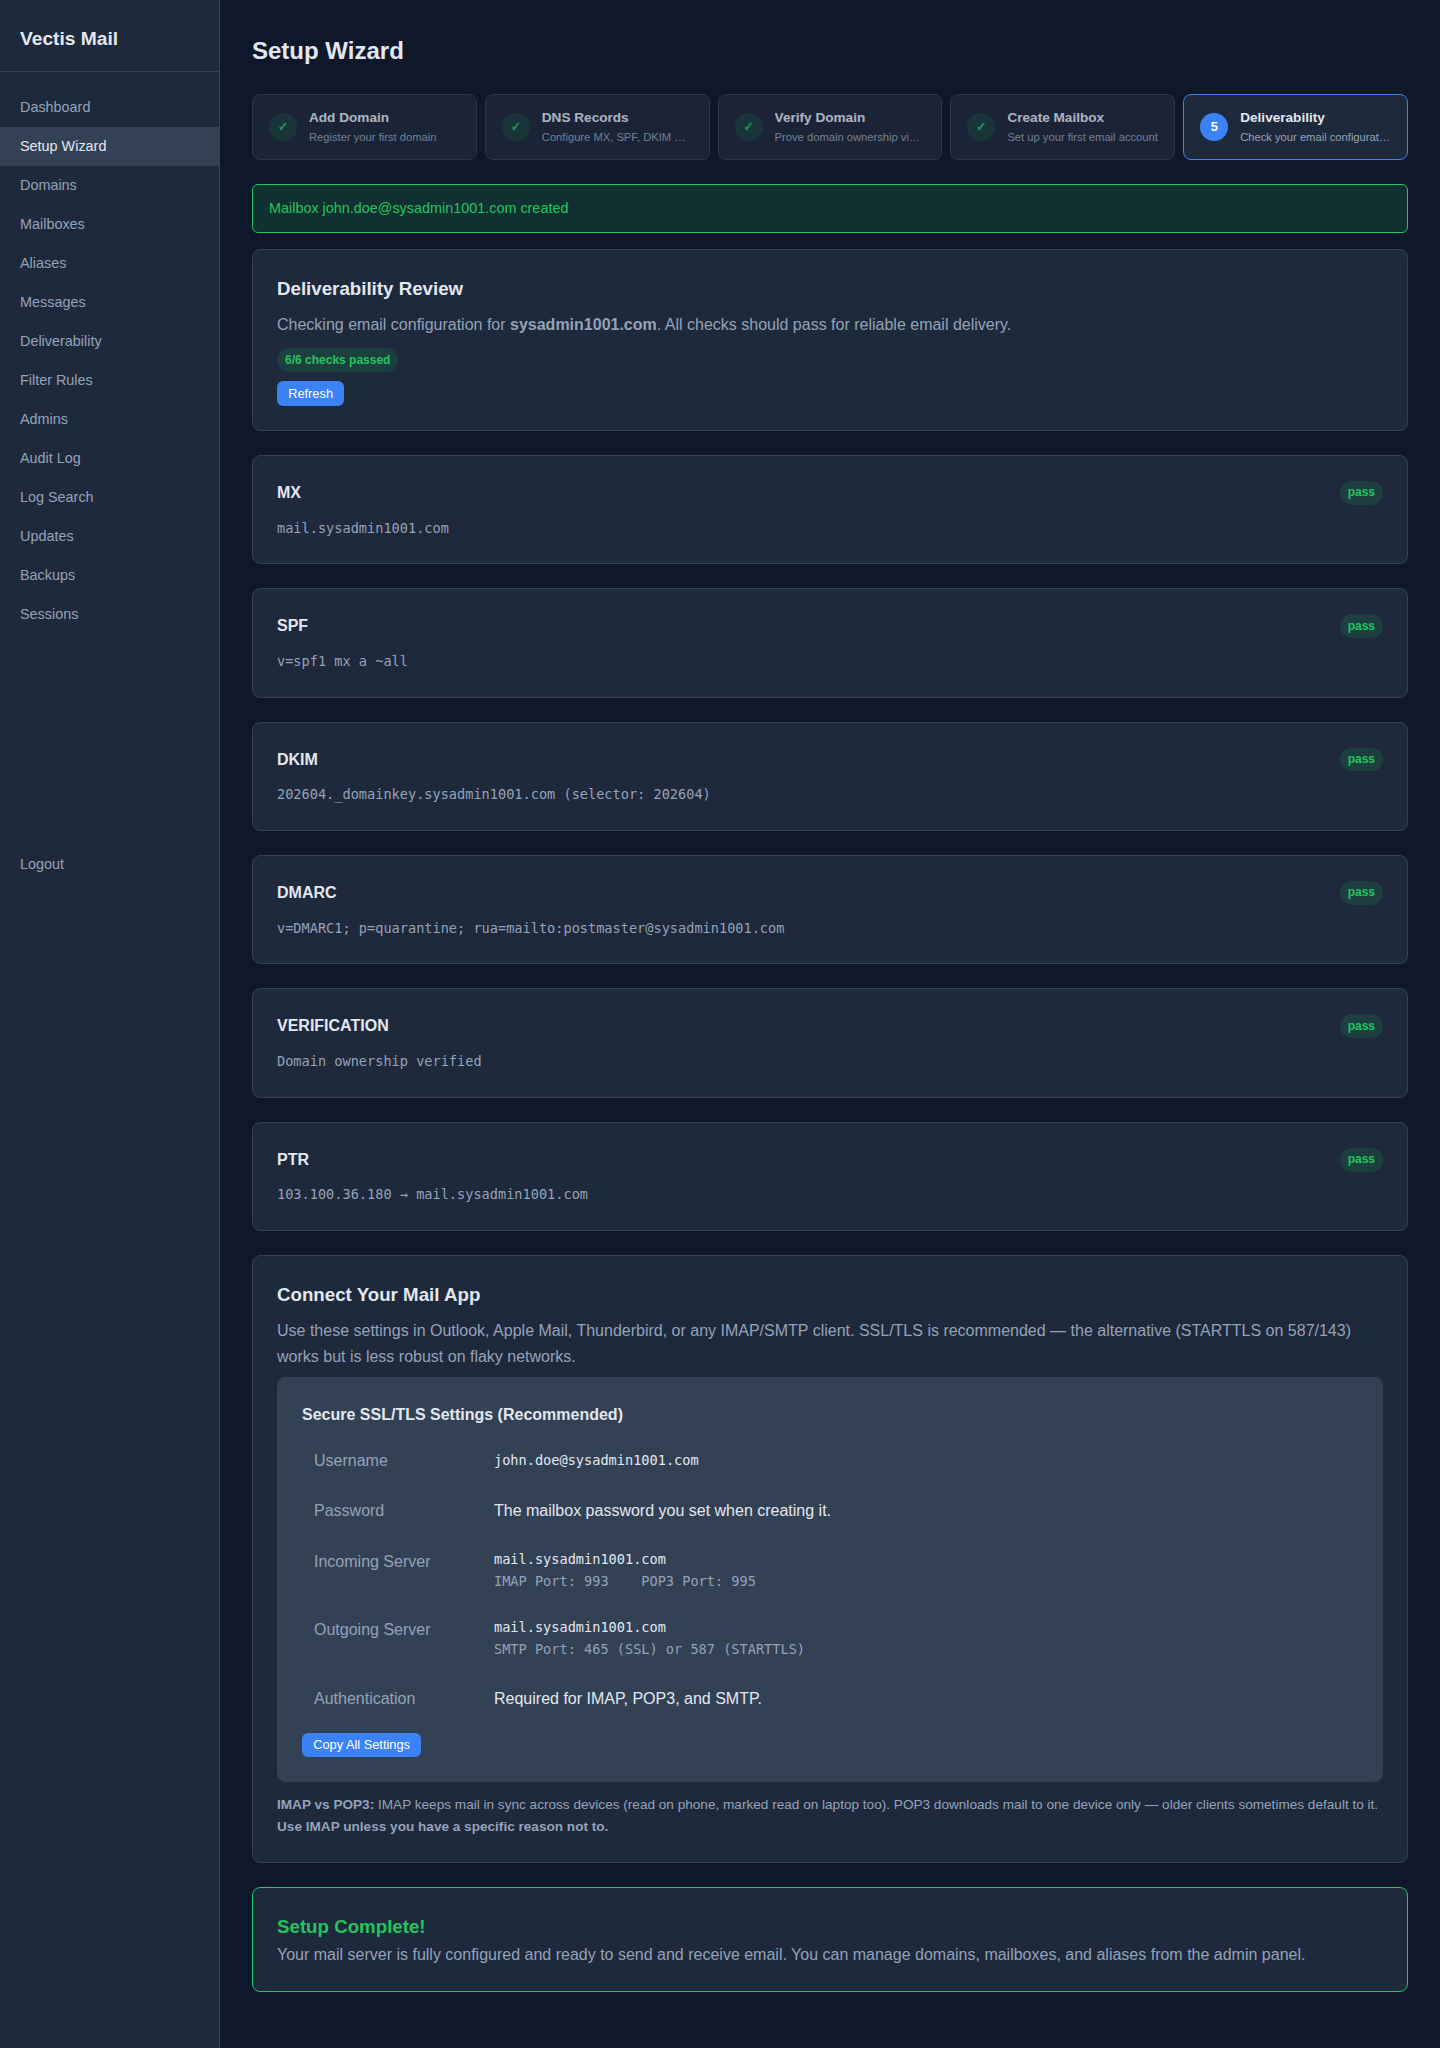
Step 5 — Deliverability review
Section titled “Step 5 — Deliverability review”The wizard runs six live checks against your domain: MX, SPF, DKIM, DMARC, Verification, and PTR. Every one should show pass for reliable delivery to Gmail, Outlook, and friends.
If any check shows fail, click into it for the specific record Vectis expected versus what it found. The most common cause is DNS propagation lag — click Refresh after a minute.
Connect your mail app
Section titled “Connect your mail app”On the same page, the Connect Your Mail App panel shows the exact settings for Outlook, Apple Mail, Thunderbird, or any IMAP/SMTP client.
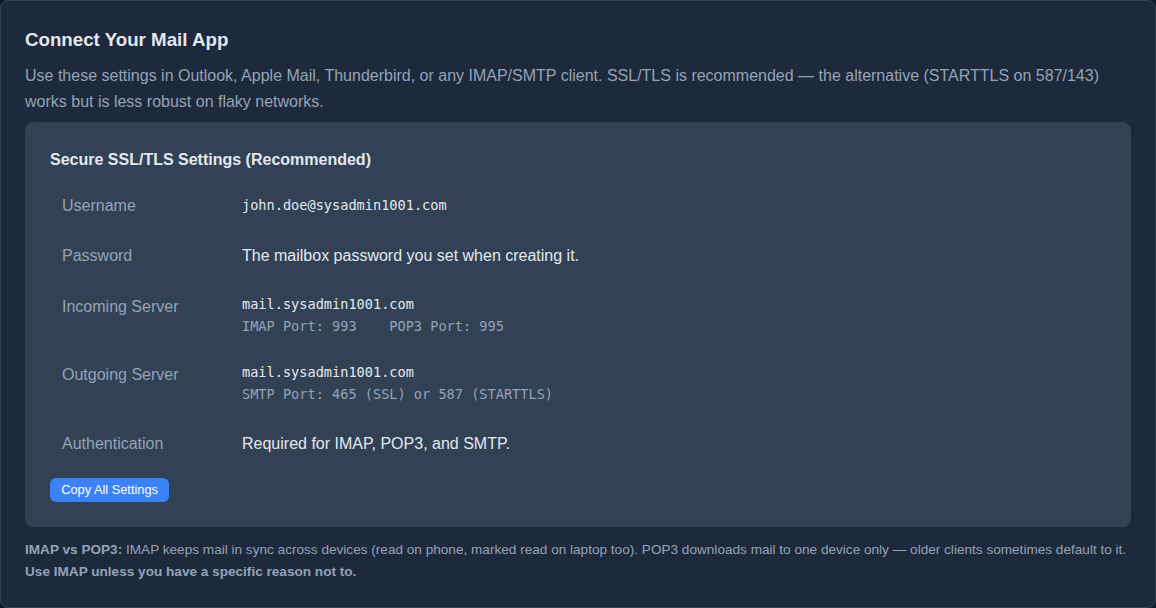
| Setting | Value |
|---|---|
| Username | you@your-domain.com (the full mailbox address) |
| Password | Whatever you set in step 4 |
| Incoming | Your Vectis host, port 993 (IMAP) or 995 (POP3) |
| Outgoing | Your Vectis host, port 465 (SSL) or 587 (STARTTLS) |
| Authentication | Required, same username/password for all three |
Use IMAP unless you have a specific reason not to. IMAP keeps mail in sync across devices; POP3 downloads to one device only.
Click Copy All Settings to grab everything as plain text to share with users.
Setup complete
Section titled “Setup complete”Once the banner turns green, your server is ready.

You can send a test email from any IMAP client configured with the settings above, or use the API (see below).
The admin panel
Section titled “The admin panel”After the wizard, the left-hand nav gives you access to every aspect of the server.
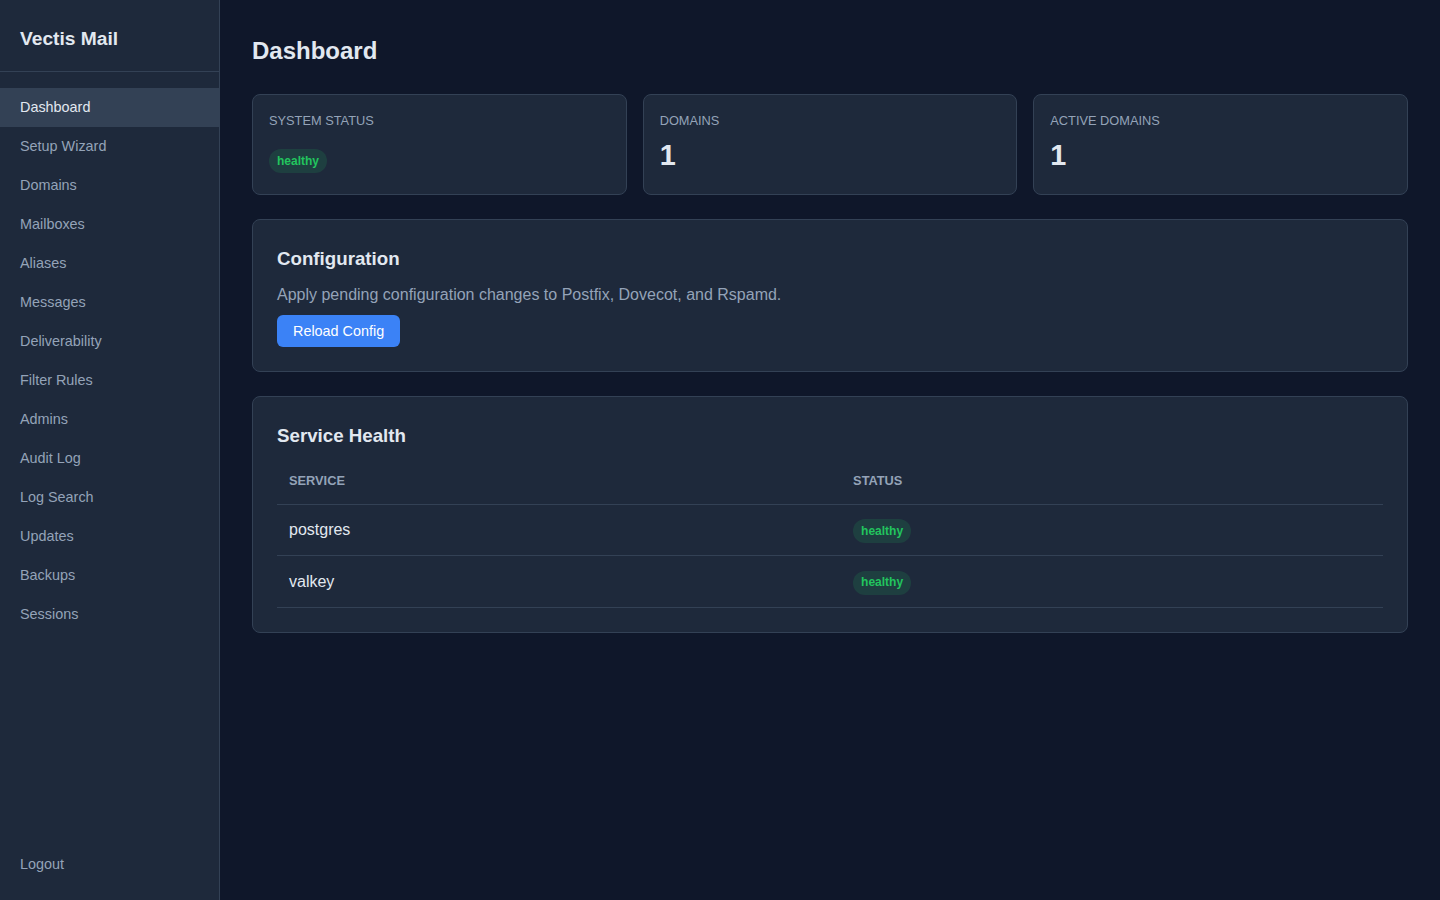
Dashboard
Section titled “Dashboard”Live system health — container status, domain counts, pending config reloads.
Domains
Section titled “Domains”Every mail domain you’ve added, with verification state, DKIM selector, and creation date. Delete from here (mailboxes must be removed first).

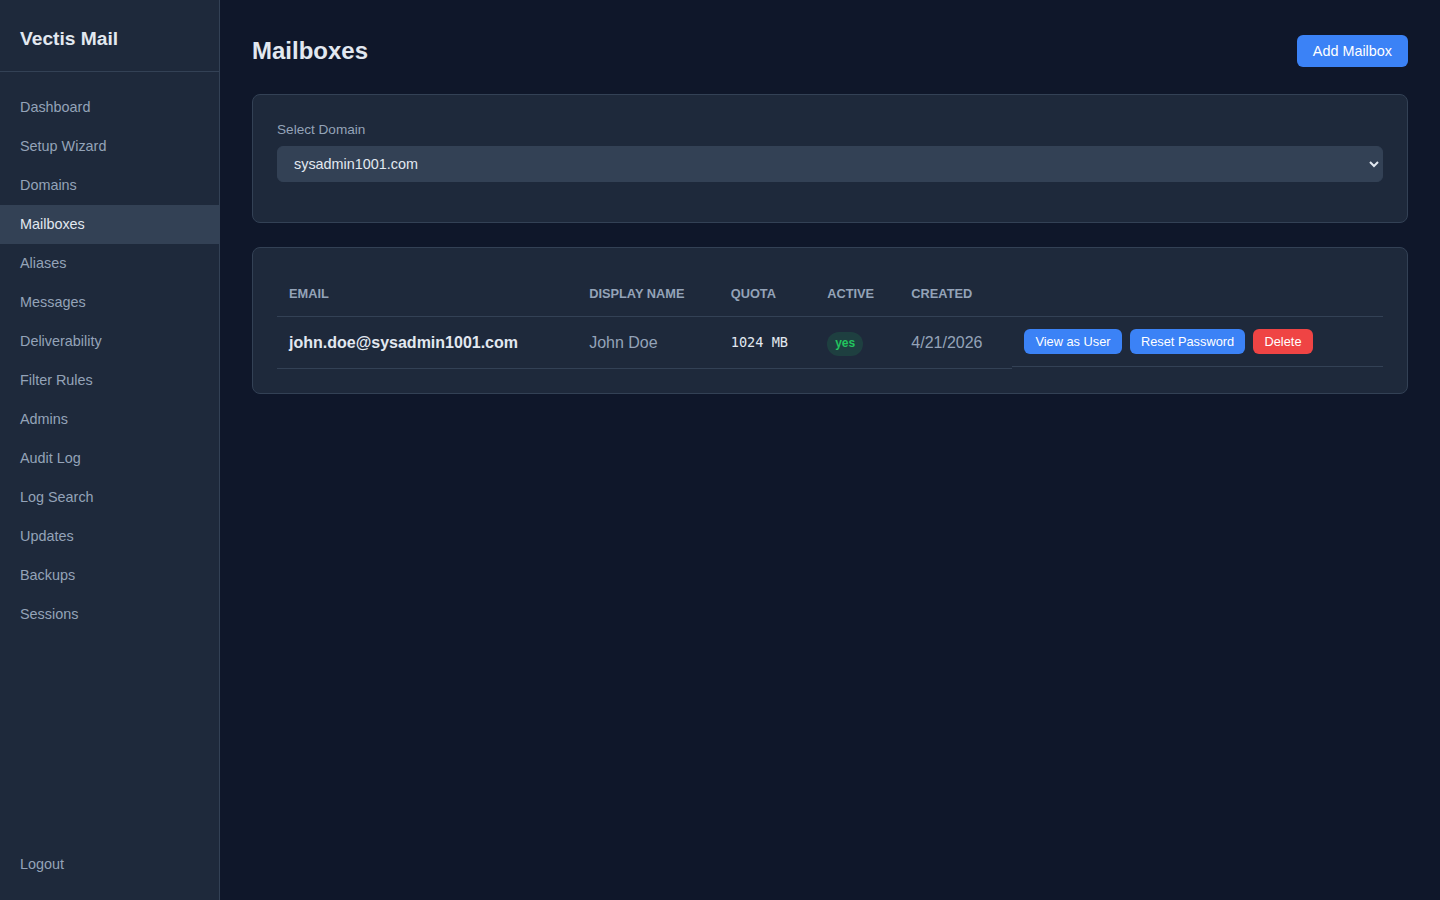
Mailboxes
Section titled “Mailboxes”All mailboxes, filtered by domain. From here you can view each user’s mailbox (as an admin), reset their password, or delete the account.
Alternative methods
Section titled “Alternative methods”If you’d rather script it or integrate with your own tooling, every wizard action is also available via CLI and API.
Via the CLI
Section titled “Via the CLI”# Add a domainvectis domain add example.com
# Create a mailbox (password prompted interactively)vectis mailbox add hello@example.com
# Verify domain ownershipvectis domain verify example.comVia the API
Section titled “Via the API”# Add a domaincurl -X POST https://your-hostname/api/v1/domains \ -H "Authorization: Bearer YOUR_TOKEN" \ -H "Content-Type: application/json" \ -d '{"name": "example.com"}'
# Create a mailboxcurl -X POST https://your-hostname/api/v1/mailboxes \ -H "Authorization: Bearer YOUR_TOKEN" \ -H "Content-Type: application/json" \ -d '{ "domain_id": "DOMAIN_UUID", "local_part": "hello", "password": "a-strong-password", "display_name": "Hello World" }'
# Send a test emailcurl -X POST https://your-hostname/api/v1/send \ -H "Authorization: Bearer YOUR_TOKEN" \ -H "Content-Type: application/json" \ -d '{ "from": {"email": "hello@example.com", "name": "Test"}, "to": [{"email": "you@gmail.com"}], "subject": "Hello from Vectis Mail", "text_body": "If you receive this, your mail server is working!" }'Next steps
Section titled “Next steps”- Configure DNS records for full deliverability
- Set up DKIM, SPF, and DMARC
![]() Written by Ian Holt
Written by Ian Holt